And I’m not talking about the burning sensation and redness that forms from sitting down-wind around the campfire!
I think it is safe to say that the smokey eye has become a classic and is here to stay. It comes across as the modern look of sexy sophistication. However the black and dark charcoal used in it are much too dark for the bright colors and airy fashions of spring and summery. What’s a woman to do?
The answer is simple. Think silver and take this sultry look into spring by using the smokey eye technique with lighter colors.
For my spring smokey eye I went with:
- Gray/Gunmetal – actually, the first thing I came up with when trying to describe the darkest of my color trio is a non-stick cookie sheet. This would be the perfect match for my shadow.
- Silver or Platinum – think of that beautiful herringbone silver necklace hiding in your jewelry cabinet or the band on that gorgeous engagement ring your cousin flashed at the last family get together
- White – I think we all know what white is. If not you need to go back to preschool with my daughter.
Now that we’ve figured out the colors let’s talk tools. I use 4 different brushes for this look.
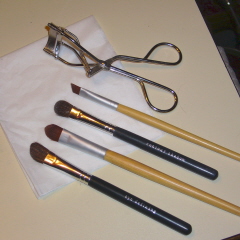
- Eye defining shadow brush
- All over eye shadow brush
- Contour brush
- Angled eye liner brush
The fifth tool is an eyelash curler. You have one of these, right? It makes a world of difference, but is completely optional. Don’t run out and buy one on my account.
Time to start putting the color into place.
Step 0 – Apply shadow primer. I call this ‘step 0’ because it is optional for some. However I’m one of those people whose eye shadow won’t last more than 2 hours before creasing, smudging and disappearing without shadow primer so that’s where I start.
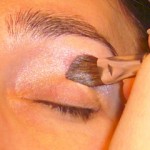 Step 1 – Apply the lightest shadow color, the white, on your upper lids from crease to brow. Most tutorials for a smokey eye will have you cover the entire lid but I’ve been happier with the look when I only apply from the crease up and reduce some of the layering of shadow powder.
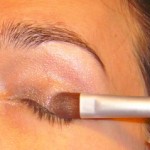 Step 2 – Apply the darkest color, non-stick cookie sheet/gunmetal, to the lower lid from lash line to crease using the all over shadow brush.
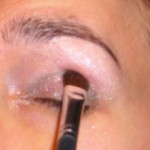 Step 3 – Using the contour brush apply a smudge of the middle color, silver, to the crease.
Step 4 – Apply a thin line of eye liner along your upper and lower lash lines. I used black because it is what I have in the house but I think a charcoal or dark gray would look better with the spring/summer smokey eye.
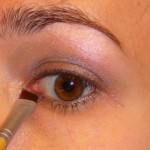 Step 5 – Using the liner brush (a smudge brush may also work well. I don’t own one yet.) lightly spread a little of the dark color, gunmetal, right into the lower lash line.
Step 6 – Curl your lashes using an eyelash curler and apply mascara. Jo-Lynne listed some great tips she learned for applying mascara in this post on 5 Minutes for Books.
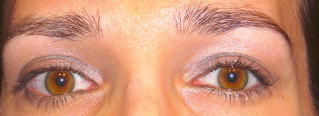 Doesn’t that look more appropriate for a poolside cocktail party on a sweltering summer evening?
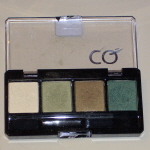 The smokey eye technique is very versatile. Don’t stop with silver, get creative! You can make this technique work with any monochromatic color scheme – any 3 shades in the same color family. I’ve done this with green in the past month and it was fabulous with my brown eyes, pixie-like but for adults. I’m fairly sure that Disney and Tinkerbell did NOT come to mind when Honey saw me.
What other colors do you think would work well using the smokey eye technique? Are you daring enough to try it?


AWESOME tutorial! Love the look! 🙂
I love love love a dark plum on eyes but I have to admit I go much darker for a smokey look and generally only use it at night. Your version seems more versatile!
I love it! – which brush did you use in step one? (sorry, I’m brush illiterate – I NEED eye makeup brushes!)
TidyMom – In Step 1 I used an Eye Defining Shadow Brush. If you look at the picture of the tools it is the one farthest away from the eyelash curler with a black handle. I listed the brushes I used under that picture in backward order – Brush #1 being at the bottom of the pic and brush #4 being closest to the eyelash curler.
I’m definitely not brave enough to try it. Shimmery scares me. Looks great on YOU though.
Darla –
Don’t get discouraged just because I used shimmery shadows. This works great with matte shadows. The green palette I pictured at the bottom of the post is a perfect example. Those don’t have the slightest hint of shimmer or pearl to them.
I loved the tutorial, unfortunately though I am a kohl only girl, unless I am going to a wedding or something. Hope I get invited to a wedding soon to try this out.